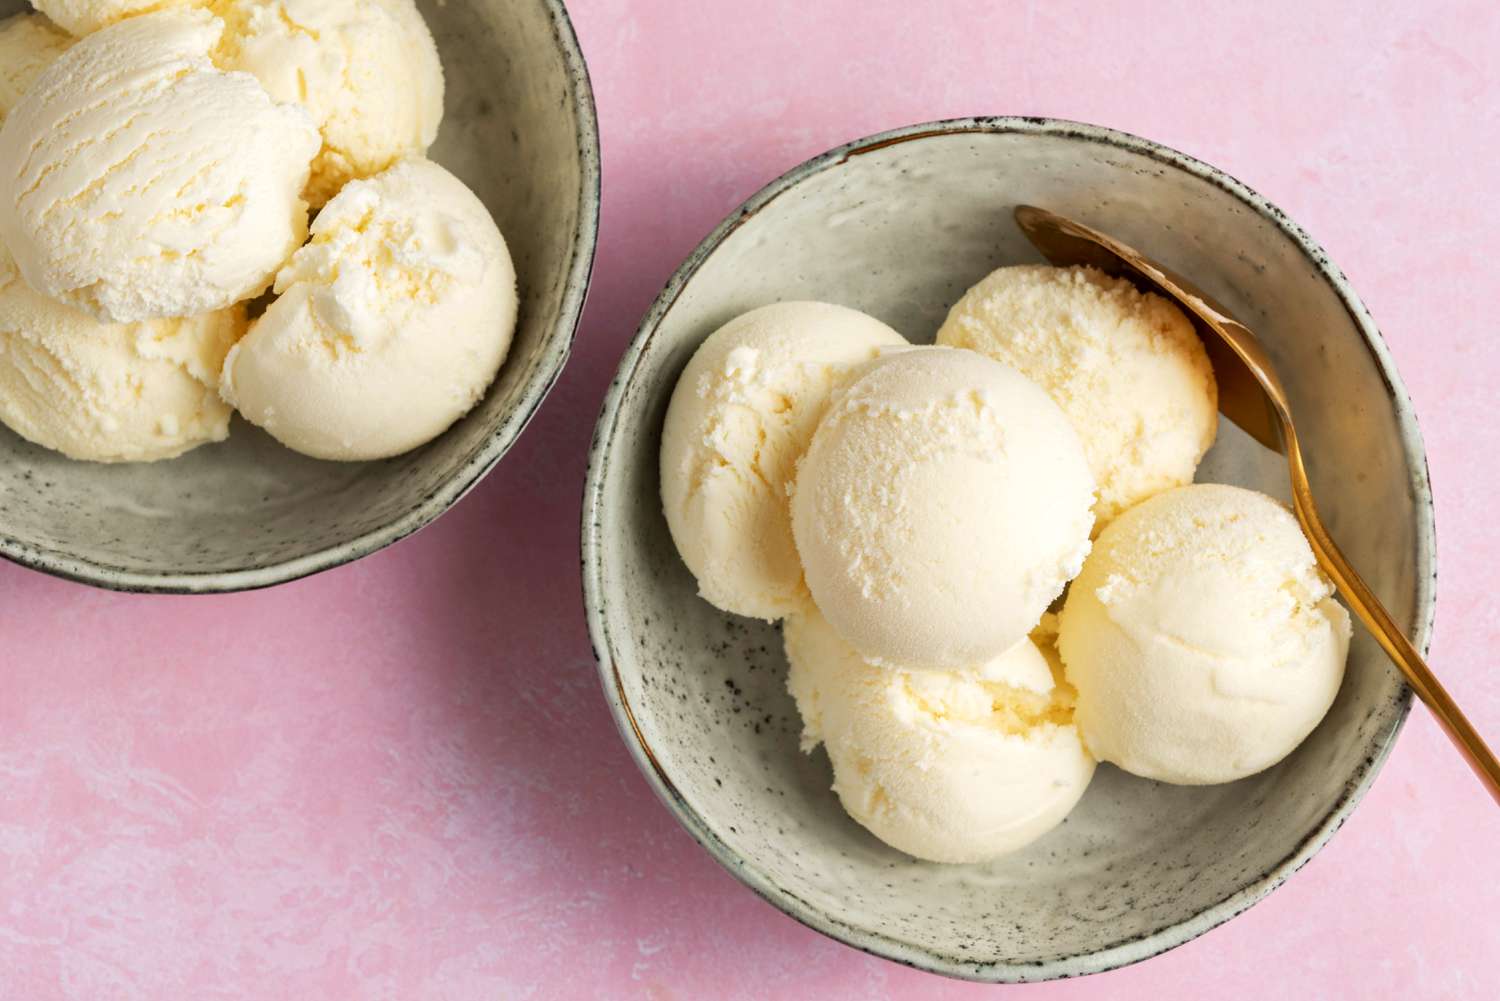
Recipe of Homemade Vanilla Ice Cream
Indulge your taste buds with the creamy sweetness of homemade vanilla ice cream. There’s nothing quite like the rich, velvety texture and pure vanilla flavor that comes from crafting this frozen treat in the comfort of your own kitchen.
In this article, we’ll take you on a delightful journey through the process of making homemade vanilla ice cream, step by step.
Here’s an Easy Recipe on How to Make Homemade Vanilla Ice Cream:
Gathering the Right Ingredients
Before we dive into the recipe, let’s start by collecting the necessary ingredients for our homemade vanilla ice cream. For a tasty and delicious homemade vanilla ice cream, you’ll need:
1. 2 cups of heavy cream (This will give your ice cream its smooth and luxurious texture.)
2. 1 cup of whole milk (The milk adds a creamy base to the mixture.)
3. 3/4 cup of granulated sugar (This is usually for that perfect touch of sweetness.)
4. 4 large egg yolks (These will help thicken the ice cream and contribute to its rich flavor.)
5. 2 teaspoons of pure vanilla extract (Make sure you go for high-quality vanilla extract for the best flavor)
Preparing the Ice Cream Base
Now that we have our ingredients ready, it’s time to prepare the ice cream base:
1. In a saucepan, combine the heavy cream and whole milk over medium heat. Heat the mixture until it starts to simmer, but avoid boiling.
2. In a separate bowl, whisk together the sugar and egg yolks until they are well combined and slightly thickened.
3. Slowly pour the hot cream and milk mixture into the bowl with the sugar and egg yolks, whisking continuously to prevent the eggs from curdling.
4. Return the mixture to the saucepan and cook over low heat, stirring constantly, until it thickens and coats the back of a spoon. This process, known as tempering, will create a smooth custard-like base.
5. Remove the saucepan from heat and stir in the pure vanilla extract. Allow the mixture to cool for a few minutes.
Chilling and Churning
Once the ice cream base is prepared, we need to chill it before churning it into a delectable frozen delight:
1. Pour the mixture into a clean bowl or container and cover it with plastic wrap, ensuring the wrap touches the surface of the mixture to prevent a skin from forming.
2. Refrigerate the mixture for at least 4 hours or overnight to allow it to cool completely.
3. Once chilled, pour the mixture into an ice cream maker and churn according to the manufacturer’s instructions. This process will incorporate air and freeze the mixture, transforming it into a smooth and creamy ice cream.
Freezing and Serving
Congratulations! Your homemade vanilla ice cream is almost ready to be devoured. Follow these final steps:
1. Transfer the churned ice cream into a lidded container, smoothing the surface with a spatula.
2. Place the container in the freezer for at least 2 hours to firm up the ice cream. This will give it the perfect scoopable consistency.
3. When you’re ready to serve, take out the ice cream, scoop it into bowls or cones, and savor the creamy goodness.
4. For an extra touch of indulgence, you can add toppings like fresh berries, chocolate sauce, or crushed nuts.
Homemade Vanilla Ice Cream Recipe With Ice Cream maker or Machine
There’s something truly magical about homemade vanilla ice cream. The smooth texture, rich flavor, and pure indulgence make it a timeless treat that delights both young and old. With the help of an ice cream maker or ice cream machine, you can bring this classic dessert to life in your own kitchen.
Recipe 1: Homemade Classic Vanilla Bean Ice Cream with an Ice Cream Maker
Ingredients
- 2 cups of heavy cream
- 1 cup of whole milk
- 3/4 cup of granulated sugar
- 1 vanilla bean (or 2 teaspoons of pure vanilla extract)
- 4 large egg yolks
Instructions and Directions for Homemade Classic Vanilla Bean Ice Cream with an Ice Cream Maker
In a saucepan, combine the heavy cream and whole milk. Heat the mixture over medium heat until it begins to simmer, without boiling.
1. In a separate bowl, whisk together the sugar and egg yolks until they are well combined and slightly thickened.
2. Split the vanilla bean lengthwise and scrape out the seeds. Add the seeds (or vanilla extract) to the sugar and egg yolk mixture, whisking to distribute evenly.
3. Slowly pour the hot cream and milk mixture into the bowl with the sugar, egg yolks, and vanilla, whisking continuously to prevent curdling.
4. Transfer the combined mixture back into the saucepan and cook over low heat, stirring constantly, until the mixture thickens and coats the back of a spoon. This creates a custard-like base infused with vanilla flavor.
5. Remove the saucepan from the heat and let the mixture cool. Once cooled, cover and refrigerate for at least 4 hours or overnight.
6. Pour the chilled mixture into your ice cream maker and churn according to the manufacturer’s instructions.
7. Once churned, transfer the ice cream to a lidded container and freeze for a few hours to firm up before serving.
Recipe 2: Homemade French Vanilla Ice Cream with an Ice Cream Maker
Ingredients
- 2 cups of heavy cream
- 1 cup of whole milk
- 3/4 cup of granulated sugar
- 2 teaspoons of pure vanilla extract
- 4 large egg yolks
Instructions and Directions for Homemade French Vanilla Ice Cream with an Ice Cream Maker
1. In a saucepan, combine the heavy cream and whole milk. Heat the mixture over medium heat until it begins to simmer, without boiling.
2. In a separate bowl, whisk together the sugar and egg yolks until they are well combined and slightly thickened.
3. You want to slowly pour the hot cream and milk mixture into the bowl with the sugar and egg yolks, whisking continuously to prevent curdling.
4. Transfer the combined mixture back into the saucepan and cook over low heat, stirring constantly, until the mixture thickens and coats the back of a spoon. This creates a smooth and creamy base.
5. Remove the saucepan from heat and stir in the pure vanilla extract.
6. Allow the mixture to cool, then cover and refrigerate for at least 4 hours or overnight.
7. Pour the chilled mixture into your ice cream maker and churn according to the manufacturer’s instructions.
8. Once churned, transfer the ice cream to a lidded container and freeze for a few hours to reach the desired consistency.
Blue Bunny Homemade Vanilla Ice Cream
Craving the creamy goodness of Blue Bunny Ice Cream but want to try your hand at making it from scratch? Look no further! Stay glued as we take you through the process of creating homemade Blue Bunny ice cream, allowing you to unleash your culinary creativity and customize your favorite flavors.
Ingredients
Here are the ingredients you will need for a perfect blue bunny homemade vanilla ice cream.
1. 2 cups of heavy cream: This will provide the rich and luxurious texture that Blue Bunny is known for.
2. 1 cup of whole milk: The milk adds a creamy base to the ice cream mixture.
3. 3/4 cup of granulated sugar: For that perfect level of sweetness.
4. 4 large egg yolks: These will help create a smooth and creamy texture.
5. 2 teaspoons of pure vanilla extract: Opt for a rich vanilla extract to enhance the overall flavor.
How to Prepare the Perfect Blue Bunny Homemade Ice Cream Base
Now that we have our ingredients ready, let’s quickly get into creating the delectable Blue Bunny ice cream base:
1. Get your hands on a saucepan. In a saucepan, combine the heavy cream and whole milk. Heat the mixture over medium heat until it begins to simmer, without boiling.
2. In a separate bowl, whisk together the sugar and egg yolks until they are well combined and slightly thickened.
3. Slowly pour the hot cream and milk mixture into the bowl with the sugar and egg yolks, whisking continuously to prevent curdling.
4. Transfer the combined mixture back into the saucepan and cook over low heat, stirring constantly, until the mixture thickens and coats the back of a spoon. This process creates a luscious custard-like base.
5. Remove the saucepan from heat and stir in the pure vanilla extract. Allow the mixture to cool for a few minutes.
Churn and Customize Your Blue Bunny Homemade Ice Cream
Once the ice cream base is prepared, it’s time to bring out the creativity and customize your very own Blue Bunny ice cream.
1. Pour the cooled mixture into an ice cream maker and churn according to the manufacturer’s instructions. This process will freeze the mixture while incorporating air, resulting in a creamy and smooth texture.
2. While churning, consider adding your favorite mix-ins such as crushed cookies, chocolate chips, fresh fruit, or caramel swirls to create unique flavors and textures. Let your imagination run wild!
3. Experiment with different flavor combinations by adding extracts, like mint or almond, or even spices like cinnamon or nutmeg. This is your chance to create your own Blue Bunny-inspired signature flavor.
Freez and Enjoy Your Homemade Blue Bunny Ice Cream
Your homemade Blue Bunny ice cream is nearly ready to be enjoyed. Here are the final steps before you do your blue bunny happy dance:
1. Transfer the churned ice cream into a lidded container, ensuring it is evenly distributed. For added fun, layer in additional mix-ins throughout the ice cream.
2. Place the container in the freezer for at least 2 hours, allowing the ice cream to firm up and develop the perfect consistency.
3. Once frozen, scoop your homemade Blue Bunny ice cream into bowls, cones, or create exciting ice cream sandwiches or sundaes.
4. For an extra touch and presentation, garnish with toppings like sprinkles, whipped cream, nuts, or chocolate sauce.